A Guide To Easy Homemade Butter

A Guide To Easy Homemade Butter

May 08, 2025

You don’t need to be a chef to make delicious homemade butter. All you need is the right butter, the right directions, and the right tools.

Why Homemade Butter?

We all know that butter is best when made from scratch. It’s not only fresher, creamier, and more affordable, but it’s also a great way to experiment with new recipes and flavours. Plus, it’s a great family activity!

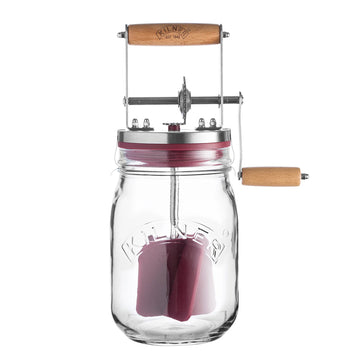
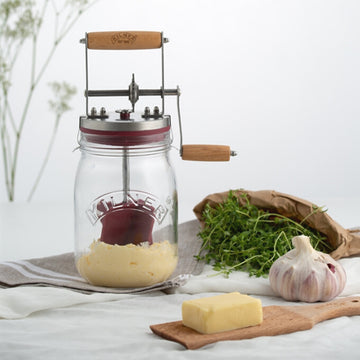
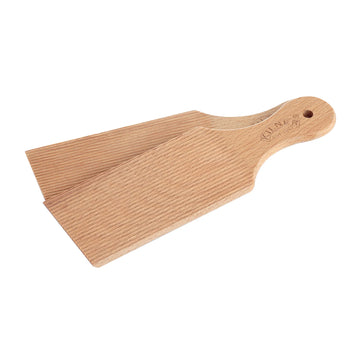
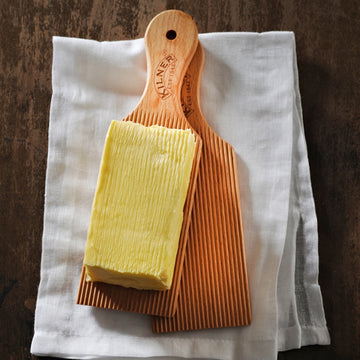
If you’re looking for the easiest way to make perfect homemade butter, you’ve come to the right place. We’ve got the perfect churner and set of 2 butter paddles to help you turn your butter into the perfect consistency. And to top it all off, we’ve also got a glass butter dish and lid to show off your freshly-made butter.

Kilners Butter Churner went viral on TikTok! Credit to @cheriedenhamcooks

Follow this easy step-by-step guide on how to turn butter into the softest, most delicious butter using our butter churner.

Butter FAQ's

How long does it take to make Homemade Butter?

It takes approximately 10 – 12 minutes to churn butter with the Kilner Butter Churner.

How long does homemade butter last?

Homemade butter has a shelf life of up to 2 – 3 weeks when kept in the fridge. You can also keep your homemade butter in the freezer for up to 9 months.

What is the best cream for homemade butter?

We recommend using any fresh whipping, heavy or double cream with a pinch of salt.

Is it healthier to make homemade butter?

Homemade butter is nutrient-rich, packed with milk proteins, vitamins A and D, and saturated fats – all of which contribute towards good bone health whilst boosting your immunity. With no hidden trans-fats and broken-down nutrients, homemade butter is much healthier than store-bought butter.

Butter Recipe

Making creamy butter at home has never been easier with this simple recipe and a Kilner butter churner. Add salt to preserve  your butter or try out one of flavoured butter recipes.

Makes approx 120g of fresh butter.

Ingredients:

300ml Fresh whipping, heavy or double cream

Pinch of Salt

Method:

1

Wash your Kilner® Butter Churner in warm soapy water, rinse and dry thoroughly.

2

Remove your cream from the refrigerator and let it stand at room temperature for 2 hours. This is important as cream at room temperature churns easier and faster.

3

Remove the lid from your butter churner. Pour the cream into the glass base and place the lid on top to create a seal. Turn the handle to start the churning process. You will notice after a couple of minutes your cream will begin to turn foamy. After 5-6 minutes the cream will thicken. After 8-10 minutes the cream will turn very thick – keep turning you are nearly there! After 10-12 minutes you will find the handle is hard to turn and then suddenly it loosens and becomes easier. If you look inside your glass jar you will see that the cream has turned pale yellow and has separated to form butter and buttermilk.

4

Remove the lid from the churner and carefully pour the buttermilk into a drinking glass. The buttermilk is similar to skimmed milk; do not throw it away as you can use it for lots of things including homemade scones.

5

Pour the butter into a mixing bowl and pour cold water on top. You can add ice to the water to help the rinsing process. With clean hands gently massage the butter and squeeze to remove the butter milk. Repeat this process twice.

6

For salted butter, sprinkle a pinch of sea salt over your butter and use Kilner® Butter Paddles to mix. Taste your butter to make sure you are happy with the flavouring and then continue to use your butter paddles to mould into a square shape. Butter paddles are excellent for moulding butter and ensuring all of the last drops of buttermilk and squeezed from your homemade butter.

7

Once you have moulded your butter into shape, you can cover with waxed paper or store in a Kilner® Glass Butter Dish. Store in the refrigerator until you are ready to use. Consume within two weeks.