This beginner’s guide to fermenting vegetables and fruits may be just the thing you need if you are looking into this preserving method.
To understand how this works, here are the basic principles and a guide to your first ferment.
Wild fermentation happens naturally
When you prepare vegetables and fruits for fermentation, a natural process of fermentation starts to happen in the jar. This is lacto-fermentation. It is the process, performed by lactic-acid bacteria on the ingredients, that transform fermentable sugars contained in plants into organic acids, carbon dioxide, ethanol and mannitol. If you use starters that contain microorganisms for easy start of fermentation, this is called culturing.
Fermentation happens in selective environment
Only certain microorganisms enable the fermentation process. By creating a selective environment you make sure that the conditions help them strive and at the same time other harmful bacteria are killed off. All these conditions include: lack of air, salt, submerged vegetables, mild temperature, avoiding exposure to direct sunlight and others. You can find ways to ensure these conditions are met with a proper preparation of the fermentation jars, see more information in the next half of this blog.
With fermentation the structure of the ingredients changes. These changes are the reason why fermented foods are so good for us.
Benefits of eating fermented foods
- Fermentation increases nutritional content in foods (vitamins, antioxidants)
- It makes fruits and vegetables more digestible: it improves bioavailability of nutrients; bacteria can produce essential enzymes that break down large molecules to the form that can be assimilated by the gut.
- Regular consumption of fermented food rich in lactic acid bacteria may have several health benefits such as managing cholesterol level, boosting immune system, reduction of food allergies and regulating appetite.
- Fermenting vegetables and fruits helps with preserving the freshly picked vegetables and fruits at the time when they are most nutritious.
Which vegetables and fruits can be fermented
As long as it contains sugar and water it can ferment. There are however some vegetables that are more complicated to ferment, especially for beginners. Root vegetables contain less water and necessary bacteria on the surface (especially when peeled). You may have to add a source of lactic acid bacteria to ferment. You can use the liquid from other lacto fermentation like sauerkraut, pickles or kimchi or excessive whey, which is a by-product of kefir cheese production. Another option is lactic acid starter culture powder.
Fermenting step by step
1. Choose ingredients
Do you have extra vegetables and fruits in your garden that you do not want to waste? Or you simply want to enjoy foods that are richer in nutrients? Pick your favourite and start to ferment now. For guaranteed success, start with basics like sauerkraut, kimchi or fermented cucumbers. If you prefer fruits, choose peaches, plums, mangoes or apricots to begin with. You can use canned frozen or fresh fruit. When using fresh, make sure it is ripe.
2. Preparation
Wash and dry selected ingredients first. After that, ingredients need to be prepared for fermentation. Depending on the vegetables or fruits and recipe, you can either chop them with a knife or grate them. Grating creates more surface area that allows salt to absorb quickly, so we use it for crunchy and hard vegetables. Slicing and chopping is best for firm vegetables or fruits like radishes, apples or carrots. Softer vegetables and fruits like zucchinis, cucumbers, plums and green beans can be left whole or just chopped into large chunky pieces.
3. Adding salt
We have two options here, dry-salting or brining. Dry-salting is used for chopped or grated vegetables/fruits that have enough surface for salt to pull out water in order for them to ferment in their own juices. It results in the most concentrated flavour, but it does not work with too large or whole pieces of vegetables. In those cases we use the brining method.
When dry salting we simply rub salt on vegetables or fruits. Usually we use 2% salt of the total ingredients weight. If brining, you have to prepare 2% brine and pour it over. Salt in brine will pull out the water from vegetables or fruits so the amount of brine will increase. In both cases you should taste brine or vegetables in a day or two and add more salt if necessary. If it is too salty, add more water. Keep in mind that you should add more salt in summer to slow down microorganisms activity and less in winter when fermentation processes take place more slowly.
4. Mix & pound
If you grated ingredients simply mix them with your hands and try squeezing them so they will release juices. You can use a pounder to bruise the vegetables and with that help them release water. At this step, combine all the ingredients, add spices, herbs and mix everything together.
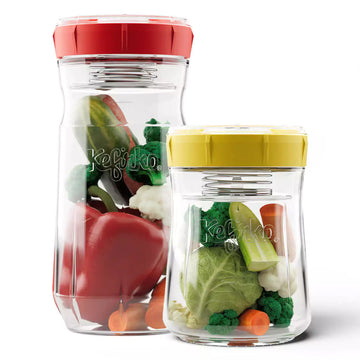
5.Pack into jar
It is important to pack the mixture tightly and press on it to remove the air pockets. Whole vegetables or large pieces are packed tightly but gently enough so they don’t damage. If using brine, pour it over ferment. Make sure it flows to every nook and cranny. Leave a bit room on top of the ferment, because the vegetables will keep on releasing the juices during the process and you need to make sure there is enough room for that.
6. Use a glass weight
Put the glass weight on top of the ferment to keep it submerged. You may use the pressing spring to push down with more force.
7. Cover & pump out the air
Cover with a lid and set the first day of the fermentation on the fermentation clock integrated into the lid. Pump out the excess air from the jar by gently pressing on the silicone pump repeatedly.
8. Let ferment
Cover with a top lid and let ferment. Depending on the recipe, let ferment for a few days or weeks. You will notice the most vigorous fermentation in the first few days. After a day or two you can start checking the taste and acidity level of your ferment and decide whether you want to continue fermentation or stop it.
That’s it!
Your ferment is ready. Rely on your taste and enjoy fresh fermented vegetables and fruits. Your gut will appreciate it and fermenting vegetables will surely become part of your everyday!


